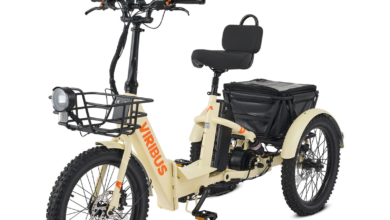
How to Convert a Manual Tricycle to Electric: A Step-by-Step Guide
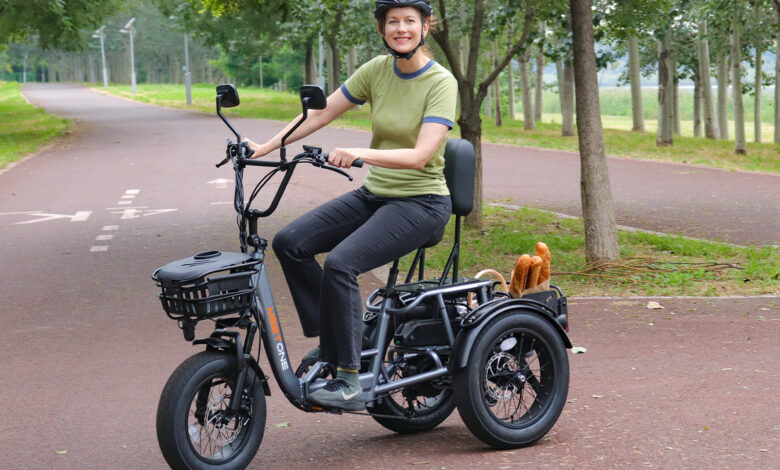
Converting a manual tricycle to an electric one is a fantastic way to enhance your riding experience. Electric tricycles, or e-trikes, offer the convenience of motor-assisted pedaling, making it easier to tackle hills, cover longer distances, and reduce physical strain. Whether you’re a DIY enthusiast or simply looking to upgrade your tricycle, this guide will walk you through the process of converting a manual tricycle to electric. From selecting the right components to installation tips, we’ve got you covered.
Contents
Why Convert a Manual Tricycle to Electric?
Before diving into the conversion process, let’s explore the benefits of turning your manual tricycle into an electric one:
- Effortless Riding: Electric assistance makes pedaling easier, especially on hills or long rides.
- Extended Range: Cover more distance without getting tired, perfect for commuting or leisurely rides.
- Eco-Friendly: Reduce your carbon footprint by using an electric motor instead of a gas-powered vehicle.
- Cost-Effective: Converting a manual tricycle is often cheaper than buying a new electric model.
Key Components Needed for Conversion
To convert your manual tricycle to electric, you’ll need the following components:
1. Electric Motor
- Choose between a hub motor (installed in the wheel) or a mid-drive motor (installed near the pedals). Hub motors are easier to install and maintain.
2. Battery Pack
- Lithium-ion batteries are the most common choice due to their lightweight and long lifespan. Ensure the battery voltage and capacity match your motor’s requirements.
3. Controller
- The controller regulates power flow between the battery and motor. Choose one compatible with your motor and battery.
4. Throttle
- A throttle allows you to control the motor’s speed. Options include twist throttles, thumb throttles, or pedal-assist sensors.
5. Charger
- A compatible charger is essential for recharging your battery.
6. Mounting Hardware
- You’ll need brackets, screws, and other hardware to secure the motor, battery, and controller to your tricycle.
7. Wiring and Connectors
- Ensure you have the necessary wiring and connectors to link all components.
Step-by-Step Guide to Converting a Manual Tricycle to Electric
Step 1: Choose the Right Conversion Kit
- Purchase a conversion kit that includes all the necessary components. Kits are available online or at local bike shops and come in various configurations to suit different tricycles.
Step 2: Prepare Your Tricycle
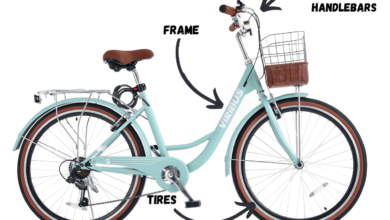
- Clean your tricycle and inspect it for any damage. Ensure the frame, wheels, and brakes are in good condition before starting the conversion.
Step 3: Install the Electric Motor
- Hub Motor: Replace the front or rear wheel with the motorized wheel included in your kit. Secure it tightly to the frame.
- Mid-Drive Motor: Install the motor near the pedals, ensuring it’s aligned with the chain and securely fastened.
Step 4: Mount the Battery
- Choose a location for the battery, such as the rear rack or under the seat. Use mounting brackets to secure it firmly to the frame.
Step 5: Install the Controller
- Attach the controller to the frame using zip ties or mounting brackets. Ensure it’s positioned in a way that protects it from water and debris.
Step 6: Connect the Wiring
- Connect the motor, battery, controller, and throttle using the provided wiring and connectors. Follow the kit’s instructions carefully to avoid mistakes.
Step 7: Install the Throttle
- Attach the throttle to the handlebars. If using a pedal-assist sensor, install it near the pedals.
Step 8: Test the System
- Before taking your e-trike for a ride, test all components to ensure they’re working correctly. Check the motor, throttle, and brakes.
Step 9: Secure and Tidy Up
- Use zip ties or cable organizers to secure loose wires and ensure a clean, professional look.
Tips for a Successful Conversion
- Choose the Right Kit: Ensure the conversion kit is compatible with your tricycle’s size and weight capacity.
- Follow Instructions: Carefully read the manual provided with your conversion kit to avoid errors.
- Safety First: Wear protective gear and double-check all connections before riding.
- Start Small: If you’re new to DIY projects, start with a simple hub motor kit before attempting a mid-drive conversion.
Maintenance Tips for Your Electric Tricycle
To keep your electric tricycle in top condition, follow these maintenance tips:
- Regular Cleaning: Wipe down the frame and components to prevent dirt buildup.
- Battery Care: Charge the battery regularly and store it in a cool, dry place.
- Tire Pressure: Check and maintain proper tire pressure for a smooth ride.
- Brake Checks: Ensure the brakes are functioning properly for safety.
- Inspect Wiring: Regularly check the wiring and connectors for wear and tear.
Conclusion
Converting a manual tricycle to electric is a rewarding project that can significantly enhance your riding experience. With the right tools, components, and a bit of patience, you can transform your tricycle into a powerful, eco-friendly e-trike. Whether you’re commuting, running errands, or simply enjoying the outdoors, an electric tricycle offers convenience, comfort, and efficiency.
By following this step-by-step guide, you’ll be well on your way to creating a custom electric tricycle that suits your needs. Happy riding!
Key Points Summary
- Benefits of Conversion: Effortless riding, extended range, eco-friendliness, and cost savings.
- Essential Components: Electric motor, battery pack, controller, throttle, charger, and mounting hardware.
- Conversion Steps: Choose a kit, prepare your tricycle, install components, and test the system.
- Maintenance Tips: Regular cleaning, battery care, tire pressure checks, and brake inspections.
Final Thoughts
Converting a manual tricycle to electric is a practical and enjoyable project that opens up new possibilities for adventure and convenience. With the right approach, you can create a custom e-trike that meets your needs and enhances your riding experience.